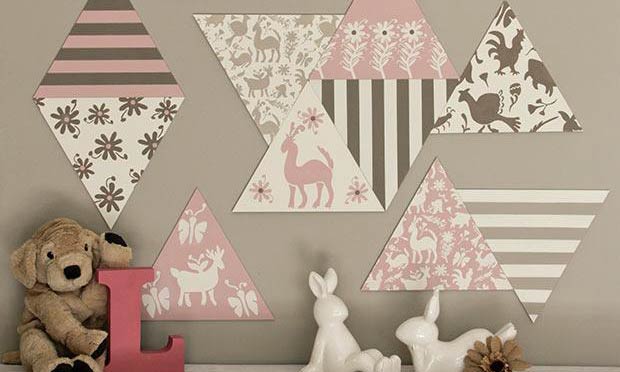
Learn how to create DIY sweet nursery wall in Neopolitan ice cream shades using Chalk Paint® by Annie Sloan, Otomi Stencils, and Triangle Wall Art Wood Shapes from Royal Design Studio.
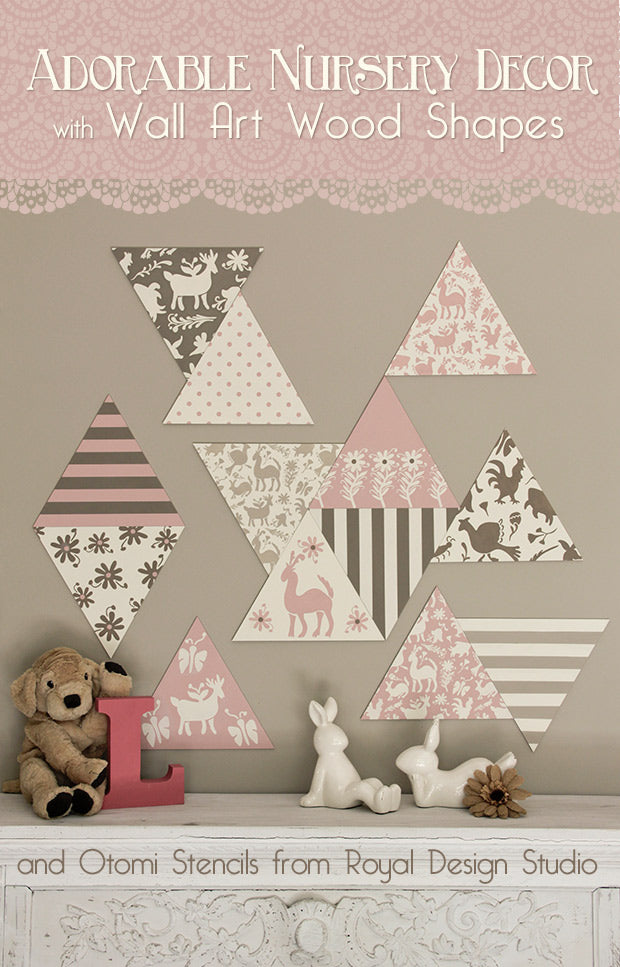
Creating your own custom wall art just got a whole lot easier with the release of our Wall Art Wood Shapes. These mix and match MDF wood tiles are available in a range of shapes and are ideal for combining with our Furniture Stencils and Mini Craft Stencil collections. Here’s how to create this soft and sweet look that is ideal for a little girls room or nursery.
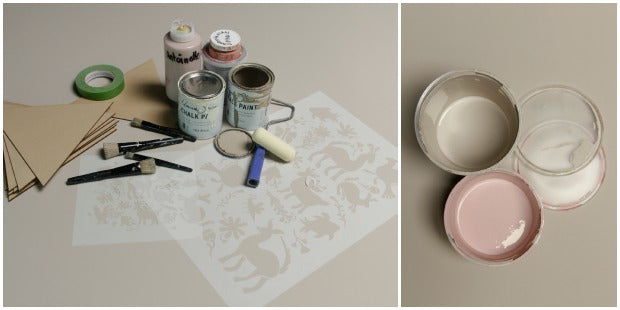
Stencil Supplies:
- Otomi Folk Craft Stencil and Otomi Folk Furniture Stencil
- Assorted Stencil Brushes
- Triangle Wall Art Wood Shapes: Small
- Chalk Paint® by Annie Sloan Colors: Old White, Coco, Antoinette, and Scandinavian Pink
- Annie Sloan® Clear Wax
- 1” Frog Tape
- Foam rollers, roller handle and tray
- Paper towels, Fine Sandpaper, Cheesecloth
Create some custom Chalk Paint® color mixes:
- Wall Color: 1 part Coco Chalk Paint/ 1 part Old White Chalk Paint
- Sweet Pink: Antoinette Chalk Paint with just a touch of Scandinavian Pink to warm it!
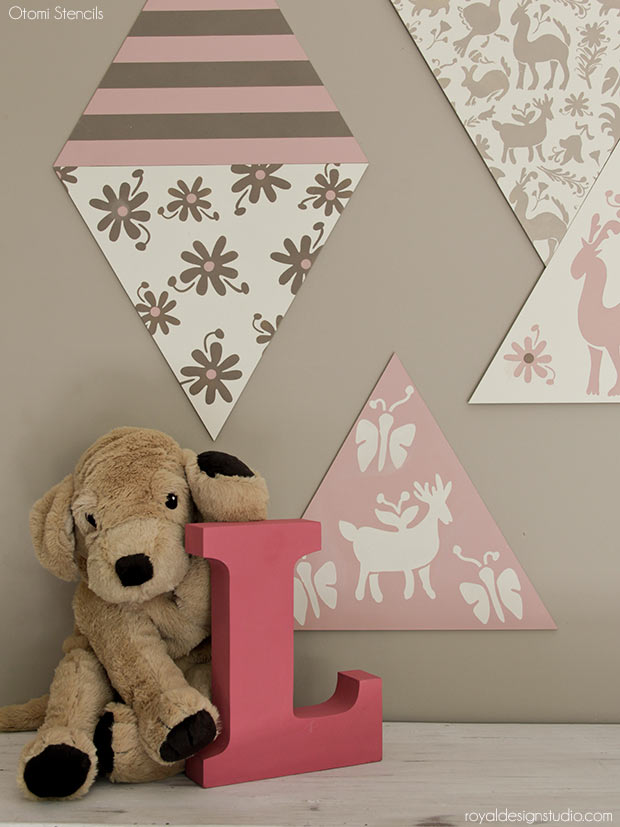
There are 4 colors used in this stencil project. The two custom colors above, and also Old White and Coco. You can mix and match the colors on the triangle tiles as you wish, or simply follow our lead! Use a foam roller to basecoat your triangle shapes. Paint 8 with Old White Chalk Paint®, 4 with the Sweet Pink color and 1 with Coco Chalk Paint®.
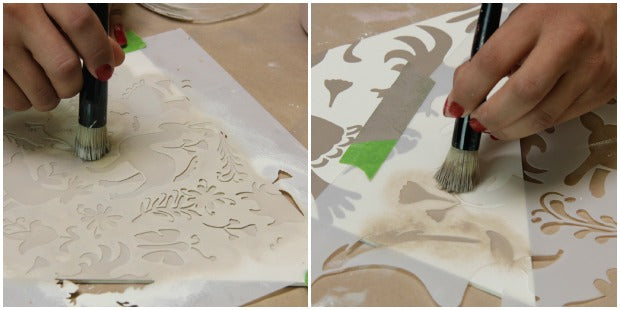
We used 2 sizes of the adorable Otomi Folk Art stencil. The whimsical animals, insects and flowers can be stenciled in the allover repeat pattern that is repeated in the stencil. Because the individual triangle shapes are a small scale it is easy to stencil different areas of the pattern in different triangles for variety.
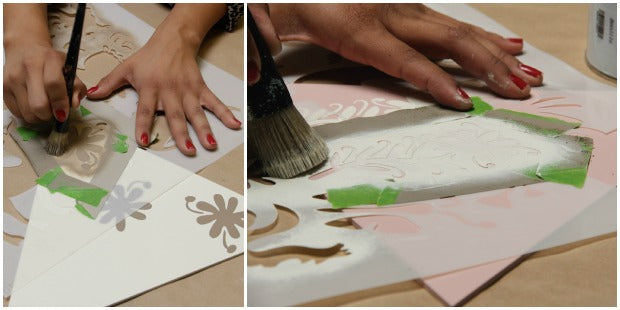
For even more variety, we picked out some random animal and flower elements to repeat in unique ways on some of the triangles.
Creating custom patterned wall art like this is similar to picking out coordinating fabrics for your home. It’s always best to mix up the scale of the patterns and to combine some simple geometric patterns like stripes and polka dots with floral designs and organic shape. This adds some visual punch and the simple geometric patterns actually compliment rather than compete with softer looks.
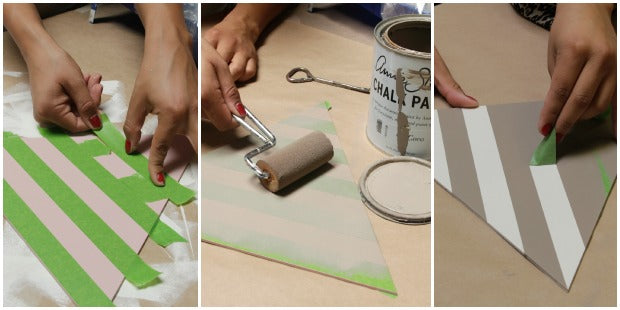
Stenciled stripes are easy to create using 1” Frog Tape. The Frog Tape is self-sealing. When the edge of the tape comes into contact with paint a special coating is released that actually prevents the paint from seeping under the edge. How cool is that? Use smaller pieces of tape to help space the tape stripes out evenly and roll with the color of your choice using a foam roller.

Polka dot patterns are a classic for a nursery and pretty much anywhere else. So, naturally they were an easy choice for this stencil project. Plus, the polka dots were the perfect size for adding a pop of contrasting color in our stenciled Otomi flowers!
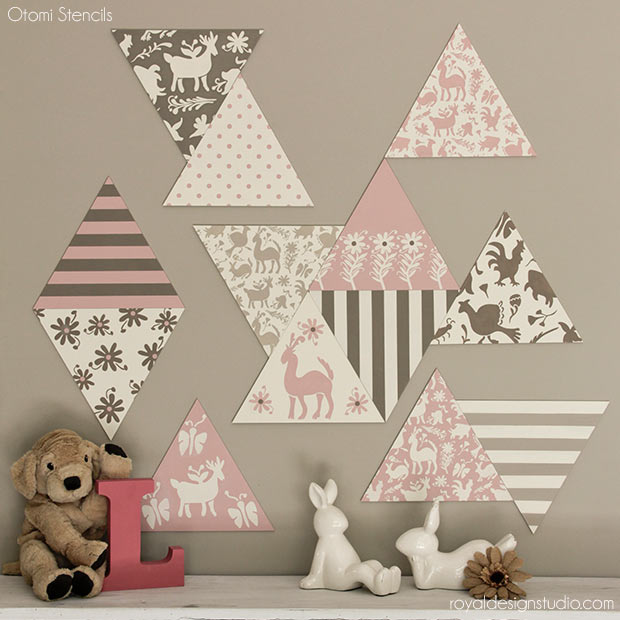
Finishing off your stenciled wood wall art: Use fine 400-grit sandpaper or even a piece of paper bag to lightly sand and buff your stenciled triangles and remove any build-up paint ridges caused by the stenciling.
It is not necessary to seal these before hanging on the wall, but if you want a soft sheen to them you can wax them with Annie Sloan Clear Wax. Apply a thin layer of wax with cheesecloth. Remove excess immediately with a clean piece of cheesecloth and buff to a soft sheen.
Hanging Wall Art Wood Shapes:
The TriangleWall Art Wood Shapes are cut from ¼” MDF. and are lightweight and easy to hang using several low-tack Scotch Removable Mounting Squares for each wood tile shape. These are ideal for smooth walls, will hold securely and will not damage your walls when you remove them.

More Triangle Wall Art Decorating Ideas!
- This project would make a great baby shower gift or could even be incorporating into a craft themed baby shower party, with participants each stenciling one of the shapes.
- Simply change the pink color in this project to Louis Blue Chalk Paint® and you have wall art that is ready to hang in a boy’s nursery.
- Place the triangles end to end in a horizontal or vertical row to create a dynamic border effect.
- There are many ways to decorate the Wall Art Wood Shapes, even if you don’t want to stencil. Cover them with scrapbook paper, wrapping or fabric using Mod Podge, or simply paint them with various colors of acrylic, latex, Royal Stencil Crème Paints or Chalk Paint®!
Be sure to visit all of our Wall Art Wood Shape stencil tutorials for more fun decorating ideas for stenciled wall decor!


