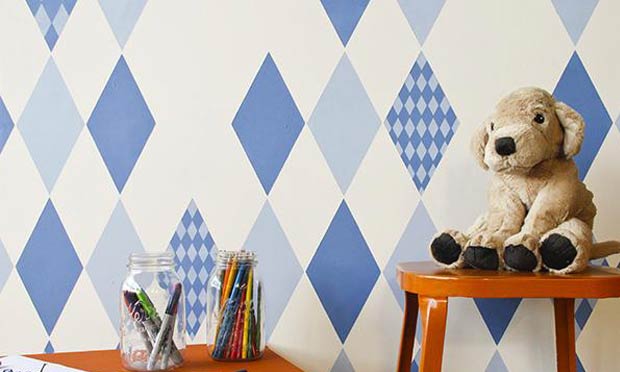
We’re bringing on the diamonds with this fun Harlequin Stencil wall finish that shows you how to stencil with pattern on pattern AND use stencils more playfully on a wall surface. How?? By starting to stencil your pattern more completely at the bottom of the wall and then allow the pattern to “break up” a bit as it travels upwards. Not only does this idea mean that you can get your stenciling done faster, it also makes for a more personal and creative stencil finish. Read on to see how we did it!

Royal Design Studio has a whole series of Harlequin Diamond Stencils in different sizes; five in fact! Here, we’ve combined 3 sizes of the same pattern, but you can also incorporate other small-scale stencil designs within the larger diamonds for even more creative fun.
Stencil Supplies
- Harlequin Diamond Pattern Stencils in 3 sizes: Large Size Harlequin Wall Stencil, Small Size Harlequin Furniture Stencil, Harlequin Craft Stencil
- Chalk Paint® by Annie Sloan colors: Louis Blue and Greek Blue.
- Stencil Brushes: 2 - 2” and 2- ¾”
- Stencil Foam Roller Set
- Painter’s Tape, Paper Towels

Step 1: Place your stencil on the wall starting from the bottom, where the pattern will be stenciled in full. Make sure the stencil is level and centered on your wall-especially if you are just stenciling a feature wall as we did.
Use a 2” stencil brush or a small Stencil Foam Roller to paint every other diamond on the harlequin pattern with Louis Blue Chalk Paint®. Use Greek Blue Chalk Paint® to then stencil in the alternating diamonds using the same method.

Step 2: When you move the stencil up the wall you will leave some diamond shapes unpainted to achieve effect that the pattern is randomly breaking up. Remember to follow the same pattern of alternating paint colors that you used in the first repeats below.
To better help you keep track of which paint color will go in which diamond shape-or not-you can use different colors of tape as a guide to plan which diamond element to stencil in which shade of blue and which diamonds to leave blank. Continue moving up the wall as far as you would like, decreasing the number of diamonds you stencil in as you go.

Step 3: Once you are finished with the large harlequin pattern stenciling select some random diamond shapes to overlay with the smaller harlequin stencil patterns. Replace the Large Harlequin Wall Stencil over the stenciled diamonds. Stencil the Small Harlequin Furniture Stencil and the Craft Size Harlequin Stencil within the original large diamonds. Alternate the colors so that you are stenciling Louis Blue over Greek Blue and vice versa.

So, how about it? Are you ready to PLAY with stenciled pattern??


