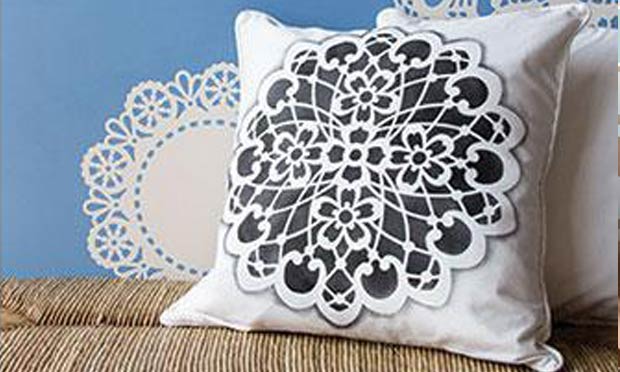
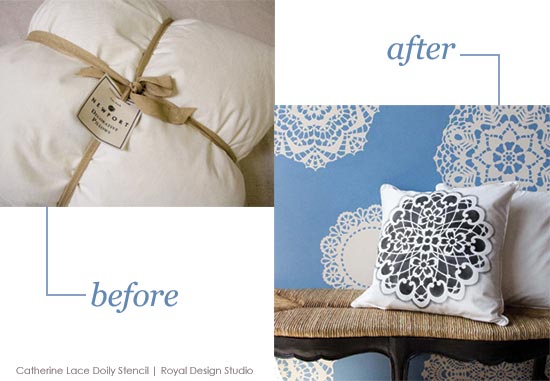
Stenciling on plain fabric pillows is one of the fastest, easiest ways to personalize your home decor! You can MAKE your own pillow covers, of course, but plain pillows that are perfect for stenciling are easily found in discount stores these days such as Marshalls, TJ Max, HomeGoods, etc. All you need is a stencil pattern from Royal Design Studio, some stencil paint that is suitable for fabric, and about a hour's worth of time! Read on for tips and more details....
We found that our Catherine Lace Doily stencil fit perfectly on this plain white canvas pillow cover. We could have stenciled it in a light gray or other pastel color for a soft look, but wanted a more dramatic accent for the setting we were putting it in-so went with Black Stencil Creme. The Stencil Creme paints that we've developed are perfect for stenciling walls, furniture and even fabrics. Unlike acrylic paints, they remain soft on the surface-which is of course what you want on a pillow!
All of our Lace Doily Stencil patterns come in two layers: a silhouette shape layer and a design detail layer which is common to our entire Stencil Impressions Collection. Because we were working on an off white background it wasn't necessary to use the silhouette shape layer. We will be using a simple stencil shading technique around the edge to define the lace doily design.
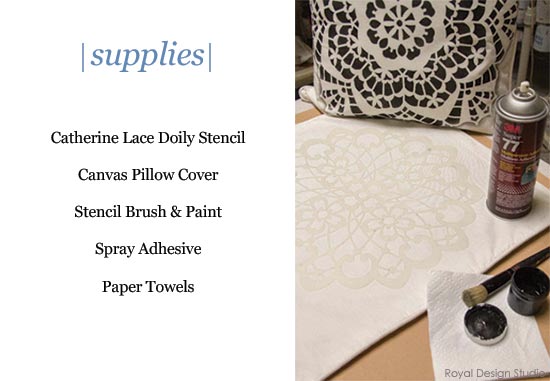
Stencil Supplies You'll Need for This Project:
Royal Stencil Cream: Flat Black
Contractor's Paper, Paper Towels, Heavy Paper, Spray Adhesive (we love 3M Super 77)
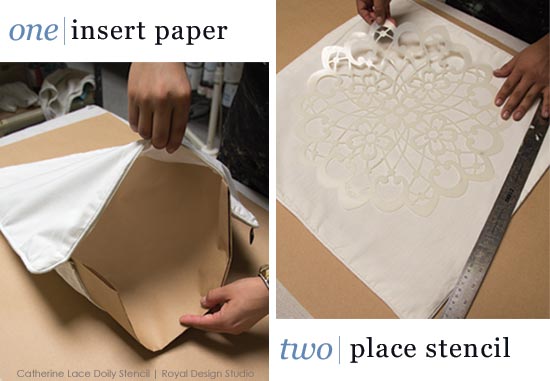
Step 1:
If you are using the proper "dry brush" stencil method, you shouldn't have any paint bleed-through on your fabric, but as a precaution you can line your pillow cover on the inside with smooth, heavy paper or plastic.
Step 2:
Because the stencil detail layer of the Catherine Doily doesn't have a blank outer edge of mylar to it (we will be stenciling both inside AND outside the stencil) we recommend the use of 3M Super 77 spray adhesive to hold the stencil in place. Lay the stencil front side down on a large sheet of paper and spray a LIGHT coating of spray adhesive while holding the can about 12" away. Allow the adhesive to "set up" for a few minutes before centering the stencil adhesive side down on the pillow cover.
Step 3:
"Dry-Brush" stenciling: Load a 1" Stencil Brush by dipping just the tips of the brush into Black Stencil Creme Paint (or substitute with acrylic paint). Offload excess paint by rubbing the brush firmly in a circular motion on good quality paper towels. Stencil the inside details of the doily pattern by using a firm circular motion with the brush and continuously moving the brush over the surface. See Basic Brush Stenciling with Royal Stencil Cremes for more info on this stencil technique.
PRO TIP! It is always better to stencil 2 thin layers of paint as opposed to one thick layer-especially on fabric where there is no room for error-or paint bleed-unders. Start light and build up color slowly to be safe.
Step 4:
Stencil carefully around the outer edge of the pattern to define the edge and create a slight shadow. To achieve this effect, use a very dry stencil brush and position the brush so that most of it rests on the mylar and just a portion of it touches the fabric area outside the stencil. Push the brush into the edge of the mylar as you stencil using a tight circular motion. PRACTICE this stencil technique first on a piece of scrap paper if it's a new technique for you!
As we said above, stenciling pillows is a quick, inexpensive way to personalize your decor. It's easy to switch out pillow covers to fit your decorating mood and to welcome a new season. You can even stencil a different pattern and color on both the front and back of a plain pillow to pull double decorating duty!!
Here are a few more tips for successful fabric stenciling:
- It's best to stencil on natural fabrics such as cotton, linen, silk, burlap, and even cotton velvet
- If you are planning wash your stenciled fabric project often it's best to pre-wash the fabric to remove the sizing.
- Besides our Royal Stencil Creme Paints you can also stencil with specially designed fabric stencil paints or even regular acrylic or latex paint.
- Add a few drops Textile Medium (found at Craft Stores) to acrylic or latex paint to make the paint softer on the surface and also help it to bond better with the fabric.
- Heat-set the fabric after stenciling by putting your item in the dryer on high for 30 minutes. Wash with cold water.
- See even more Basic Tips for Stenciling on Fabric here.


