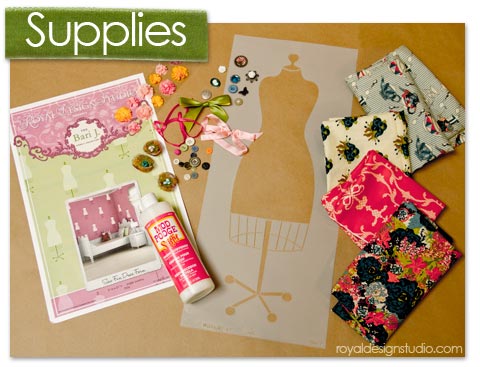
Supplies Needed for this Stencil Project:
- Royal Design Studio Stencil: Sew Fun Dress Form wall stencil
- Behr Premium Plus Ultra Paint: (basecoat) MSL043 Nasturtium, (stenciling) S460-7 Deep Breath
- 3/4" Stencil Brush
- Mod Podge Stiffy Fabric Stiffener
- Assorted Fabrics from the Bari J. Fabric Collection
- Painter's Tape
- 3M Super 77 Spray Adhesive
- Assorted Embellishment (ribbon, buttons, scrapbooking elements)
- Hot Glue Gun
- Baking Sheet or Shallow Tray
- Wax Paper
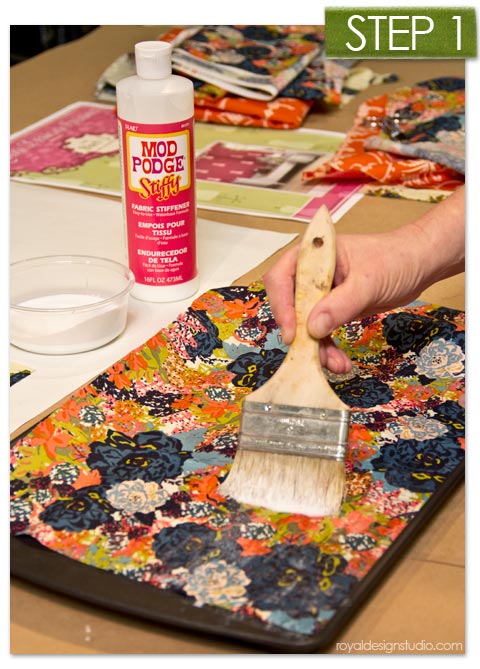
Step 1: Following manufacturer's directions, apply Mod Podge Stiffy Fabric Stiffener to both sides of the fabric with a chip brush making sure the fabric gets saturated thoroughly. Lay wet fabric on a nonstick surface to dry, making sure the fabric is completely flat while it dries. Note: If the fabric becomes wrinkled while it dries you can iron out the wrinkles by placing the fabric between two sheets of wax paper. This prevents the fabric from sticking to the iron or the surface. Set the iron on low and iron on a hard surface.
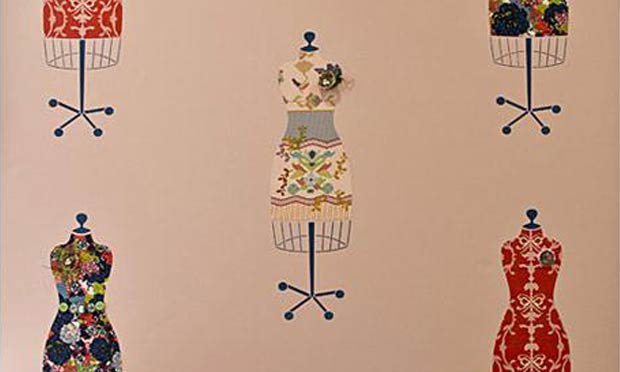
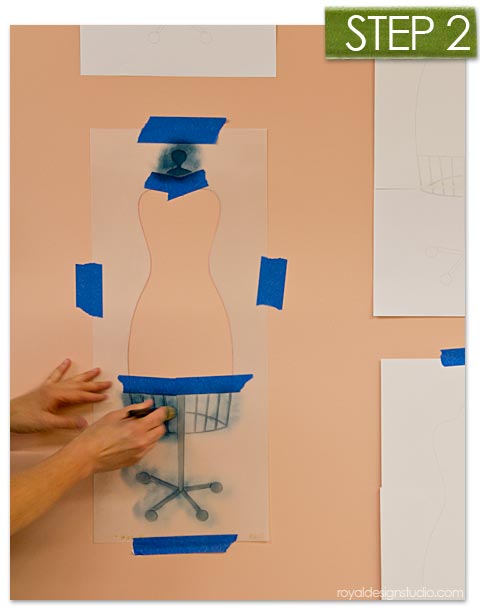
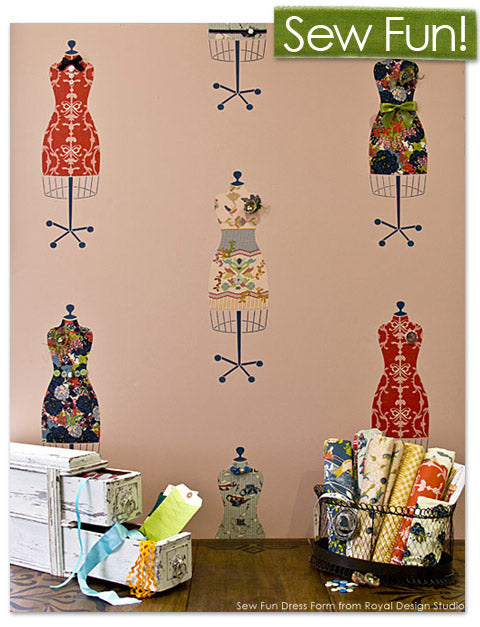
Step 2: While your fabric is drying, go ahead and determine the placement for your Sew Fun Dress Form stencils. See this how-to post for more tips on laying out a stencil motif pattern on a wall. Stencil in the top and bottom of stencil pattern in Behr paint color Deep Breath or a similar color in a craft fluid acrylic paint. Note that the dress form body is taped off to keep the stenciled paint from getting into that area. We then traced the dress form with chalk using the stencil as a guide for fabric placement. Alternatively, you could simply stencil ALL in blue paint, as the fabric shapes will cover the "body".
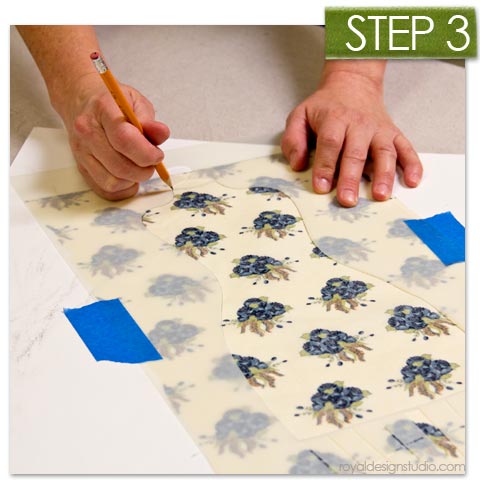
Step 3: When the fabric is dry and flat, use the clean stencil to trace the dress form outline on the back side of your fabric. Play with how the shape of the dress form works in different areas of the fabric to create different looks. Cut out the patterns with a good pair of scissors. The Mod Podge Stiffy Fabric Stiffener will keep your fabric from fraying, giving you a nice clean edge.
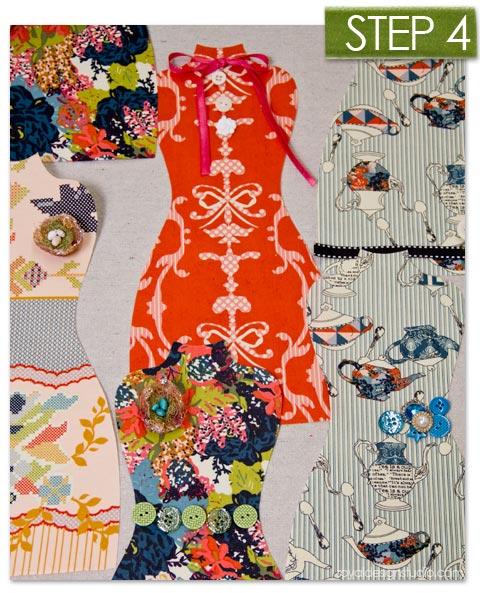
Step 4: Gather all your little ribbons and assorted goodies and have a good old time accessorizing your dresses. It is a good idea to lay them out on a table so you can plan how the patterns and colors of the dress forms will work to compliment each other in your overall design scheme.

Step 5: Spray the back side of the fabric dress forms with a good misting of spray adhesive, paying attention to the edges of the fabric. Note: Be sure to allow for good ventilation and protect surrounding areas when using Spray Adhesive. Allow the adhesive to set up for a couple minutes before placing the fabric forms on the wall. Use a credit card or similar "tool" to smooth and bond the fabric shapes to the wall securely
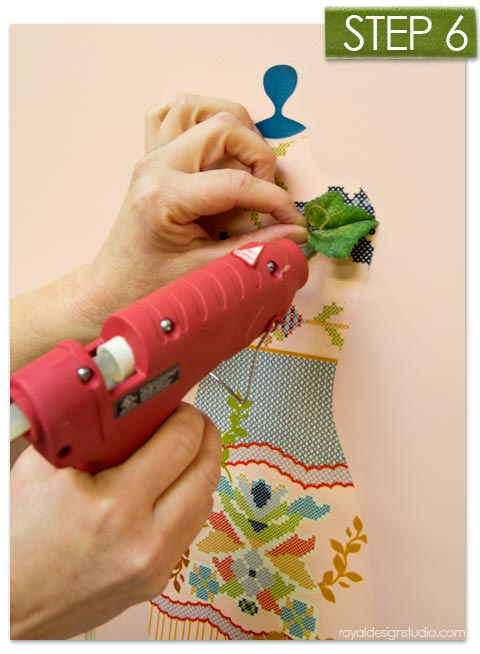
Step 6: Add embellishments by using a hot glue gun. Apply the glue to the embellishments not the surface, and stick into place. Watch out for those fingers!
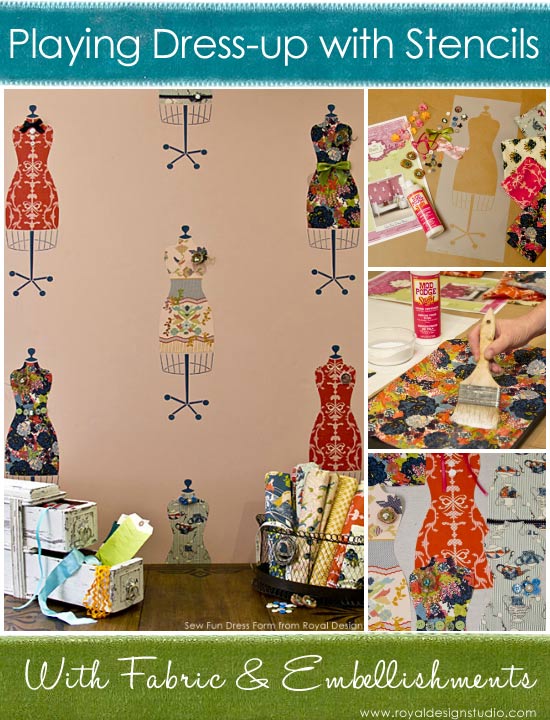
Who knew you could have Sew Much Fun with stencils?! Well, actually, WE did, and hope you are inspired to try this type of project for your own studio, little girl's room, or as a way to personalize your closet.
Here are some other ideas for using this type of mixed media stencil idea:
- Using fabric for the large silhouette area of the stencil pattern along would work equally well with the Parlor Chair wall stencil from Bari J.
- You can see another stencil technique where we stenciled pattern in pattern to create a fabric look.
- Use this stencil and technique for framed canvas art, or even on a very special gift box.
- Substitute newspaper, patterned paper or pretty gift wrap for the fabric.
- Use your amazing imagination for many more ideas: cut up maps, posters, love letters, photocopies of family photos, etc.
- Use an Embossed Stencil Technique for the Dress Form frame for added dimension.
We'd sure LOVE to see and share pics of YOUR stencil projects. Please send to projects@royaldesignstudio.com. Happy Painting!


