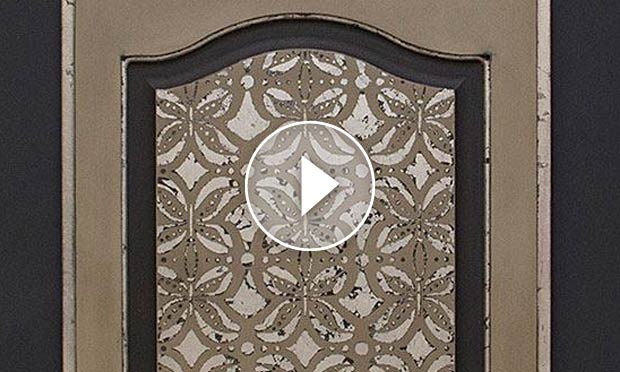
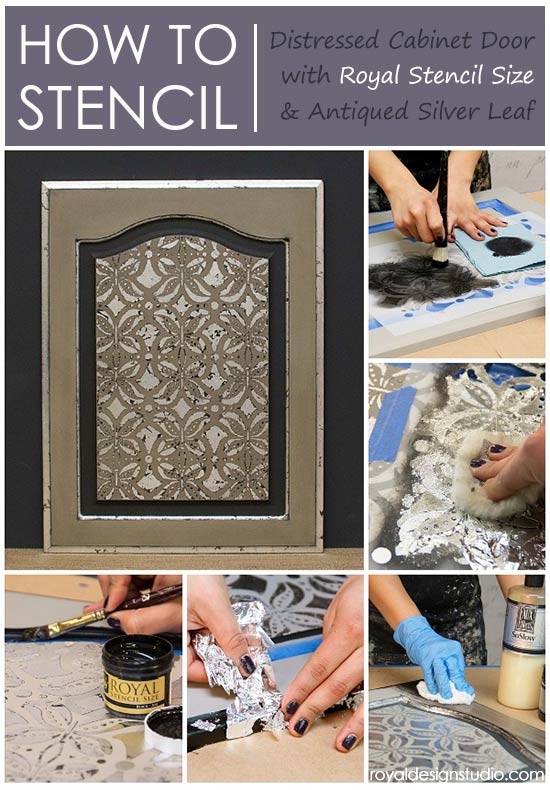
Our Signature Royal Stencil Size gilding medium is designed to make it easy for you to add gilded accents to your stenciled furniture, wall, and ceiling projects!
Here, we show you how to use our pre-tinted Black Royal Stencil Size and Chalk Paint® Decorative Paint to create a beautiful antiqued pattern finish on a cabinet door. The Black Stencil Size makes it fast and easy to add both a black color AND gilding size to an area in one quick step. The Royal Stencil Size offers amazing coverage and sets up for gilding quickly, so you can get your project done faster. Not just for stenciling, it's ideal for adding gilded details to moldings and other small areas as you'll see in this tutorial. Read on!
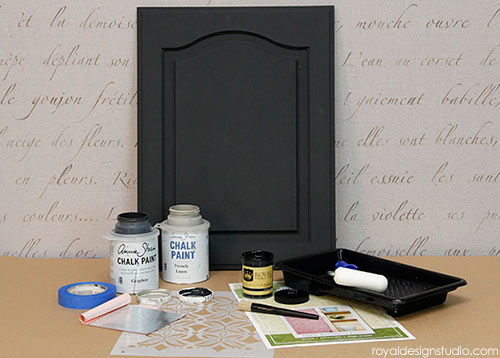
Stencil Supplies for This Project
- Butterfly Kisses Furniture Stencil
- Black Royal Stencil Size
- 1” Stencil Brush
- Aluminum Leaf (Imitation Silver)
- Chalk Paint® Decorative Paint: Graphite, French Linen
- Foam Roller / Tray
- Small Artist’s Brush
- Van Dyke Stain & Seal
- So Slow Extender for Stain & Seal
- 1” Blue Painter’s Tape
- Cheesecloth
- 400-grit Sandpaper
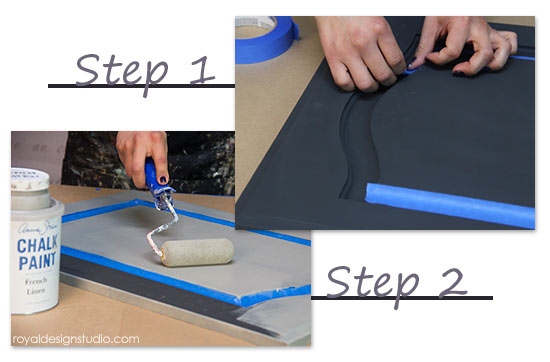
Step 1: Paint the cabinet door with 1-2 coats of Chalk Paint in Graphite using a brush or foam roller. Allow to dry between coats and after final coat. Once dry, use Painter’s Tape to tape off the areas of the door or molding that you want remain the Graphite color.
Step 2: Use a 4” foam roller to paint 2 coats of Chalk Paint® in French Linen on the exposed areas. Allow to dry.
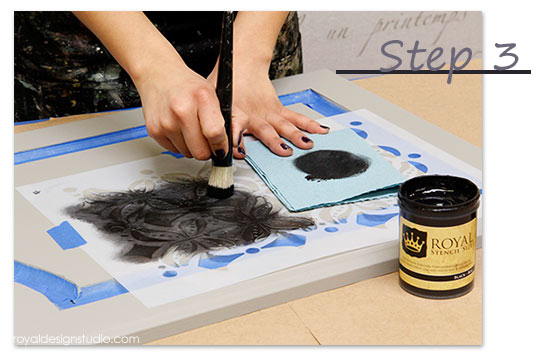
Step 3: Center an allover stencil pattern in the raised panel area of the door. Stencil the pattern with the Black Royal Stencil Size. Royal Stencil Size is best applied through a stencil using a "Dry Brush" stenciling method. To Dry Brush, simply load the tips of the brush with Stencil Size and offload onto paper towels before applying through the stencil. Stencil Size is best applied in 2 thin coats, especially over a porous surface such as Chalk Pant®.
For this project, we repeated the stencil over the whole panel area and then went back to the original starting point and added a second coat. Allow the size to come "to tack" for approximately 15 minutes. If the size is too wet, the metal leaf will not stick well. Conversely, if the size is too dry, the leaf will not stick well. Depending on environmental conditions, i.e. heat, humidity, surface, you will have an approximate good working time of 30-60 minutes once the Stencil Size has come to proper "tack".
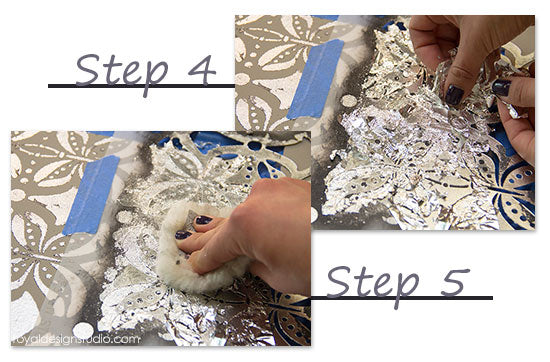
Step 4: Place the stencil back over the starting position and apply Aluminum (Imitation Silver) leaf over the stenciled areas leaving some open black areas. The easiest way to accomplish that is to crumble or tear the leaf into small pieces and place them randomly.
Step 5: Use a piece of lambswool (we find them in the paint department!) to press and buff the leaf down as you go. Buffing the leaf will break it into even smaller pieces that will continue to fill in some of the open areas of black. Lift the stencil now and again to check the look, and fill in with additional leaf as desired. Once completed, remove all tape and move on to Step 6.
Note: Of course if you wish, you can fill the design with a more solid layer of leaf. This is simply a matter of personal taste or what your project piece calls for!
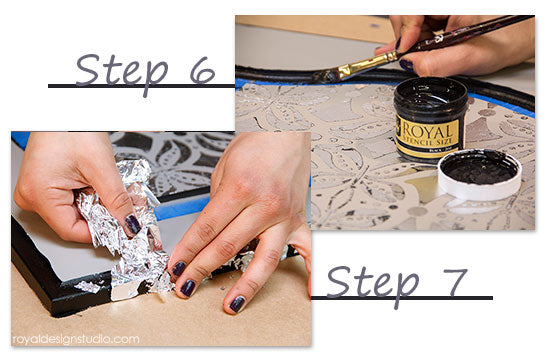
Step 6: Reapply Painter's Tape to the recessed area around the raised panel, so that you can easily paint on the size for gilding just the small rounded carving that curves up to the flap part of the door. Use a flat or round artist's brush to paint one good coat of Royal Stencil Size over that area and also the outer edge of the door. Allow this to come "to tack", approx. 15-20 minutes.
Step 7: Apply silver leaf over the areas covered with the Black Stencil Size, leaving some open areas to let the black stencil size show through, as you did with the stenciled center panel. This will result in a distressed, crackle effect which is very interesting!
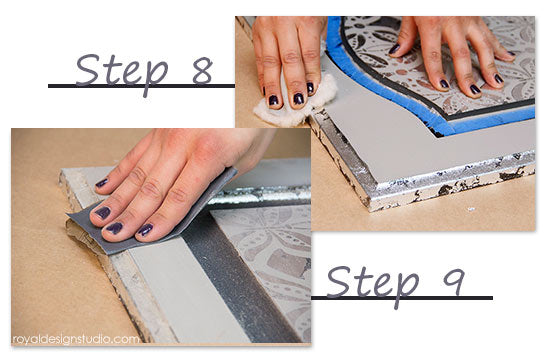
Step 8: Buff the entire panel again with a piece of lambs wool. Remove all of the Painter's Tape.
Step 9: Sand lightly with 400 grit sandpaper. This will distress the painted French Linen areas and allow some of the underlying Graphite paint to show through. The sanding will also smooth and "tighten up" the porous Chalk Paint® surface for the next steps. Wipe the entire panel piece down with a soft rag.
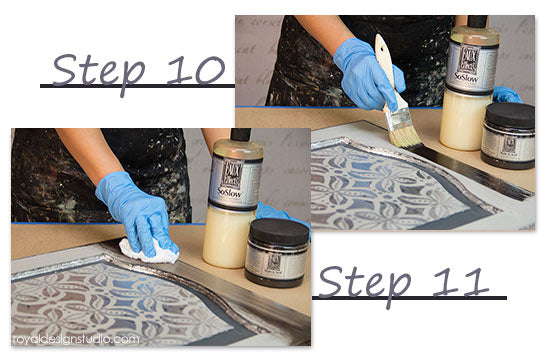
Step 10: Stain and Seal is a water-based gel stain for wood finishing. It also makes a GREAT glaze medium and toning layer for metallic finishes as the translucent dye colors bite into the surface, giving it a very rich look. It dries VERY quickly and is very heavily pigmented, so we always recommend it being used with the addition of So Slow Super Extender for Stain and Seal. Add about 40% So Slow into Van Dyke Brown Stain and Seal to make an antiquing glaze. Use a soft, natural bristle brush to brush on an even coat of the stain mix over a workable area.
Step 11: Use a wad of cheesecloth to remove excess glaze and smooth it over the surface. Keep rubbing the glaze back until you get the desired effect. It looks nice to allow an extra bit of glaze to puddle in the recessed areas of the molded edges. Continue until the entire door panel is covered. If you want a darker look, allow the first layer of stain mix to dry and add another. It is better to do two thin layers of stain to get a darker color than one heavier, more opaque layer as you have more working time with the addition of more So Slow. Note: Do not add more than 50% So Slow into your stain mix.
Finishing: Of course you will want to protect your furniture or cabinet finish with an additional durable finish. You can choose to use any water-based topcoat or wax over this finish once it is completely dry.
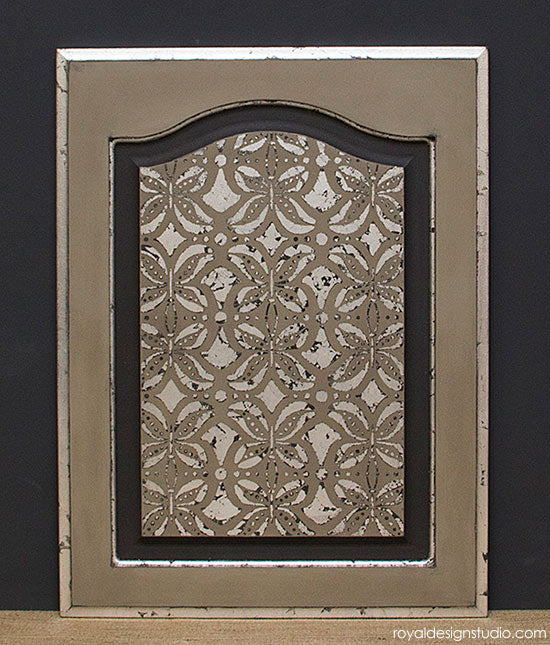
The final finish is a very handsome and classic look for both traditional AND contemporary furniture. For a more modern look, you can change the stencil pattern, of course, as well as applying the leaf more uniformly throughout. The addition of the Stain and Seal gives a rich, glowing look to the Chalk Paint® that is quite different from wax alone. Stain and Seal comes in a wide variety of earth tones, so there is a color that is perfect for every shade of paint!
There a many other ways to use Royal Stencil Size!
How to Gild a Frame with Royal Stencil Size


