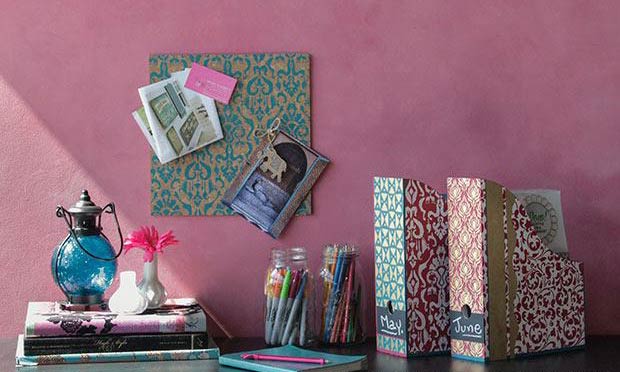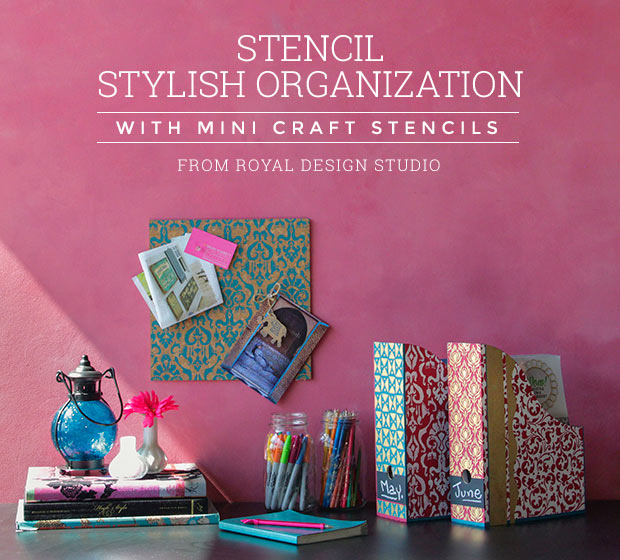
The stencils from our Mini Craft Stencils Collection are perfectly sized for crafting creative custom decoration projects large and small. See how to use them along with Frog Tape® Painter's Tape to paint some pretty organization for your desk top.
Stencil Supplies:
- Mini Craft Stencils assortment from Royal Design Studio
- Chalk Paint® by Annie Sloan colors: Pure White, Graphite, Florence, Napoleonic Blue, Burgundy and Barcelona Orange
- Clear Wax by Annie Sloan
- Clear Stencil Size by Royal Design Studio
- Gold Leaf
- 1”, ½” and ¾” Stencil Brushes
- Foam roller, handle and tray
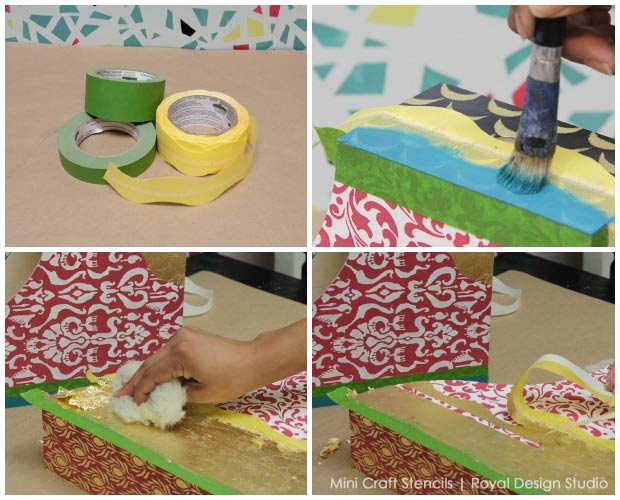
- FrogTape® 1” Painter’s Tape and Wave Shape Tape
- Small artist’s brush
- Ikea KNUFF Magazine Files/ Set of 2
Custom Chalk Paint® colors:
- Teal: 1 part Florence + ½ Napoleonic Blue
- Pink: 1 part Burgundy + ½ Barcelona Orange + ½ Pure White
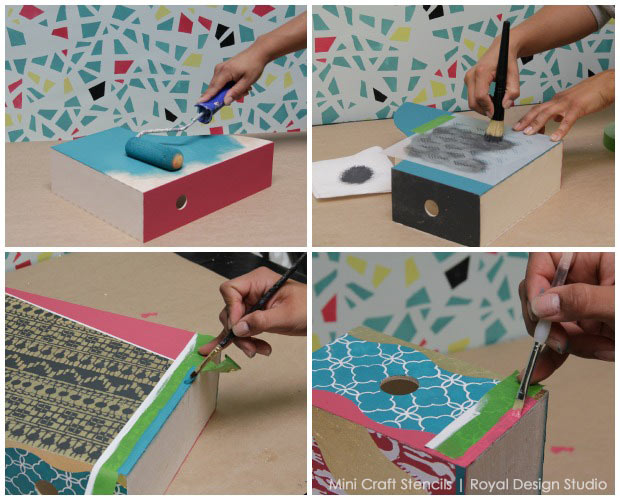
Paint each side of the magazine files using a different color of Chalk Paint®. We used Pure White, Graphite, Custom Pink, and Custom Teal. Apply two coats of each to the desired area and allow to dry.
Select a stencil from Royal Design Studio Mini Craft stencil collection (or stencils that you already have on hand) and stencil using a contrasting color from your color palette. Stencil using a ¾” stencil brush, choosing a different stencil and different color for each side. Have fun with this and be creative!
Here is a list of the stencils we used:
- Khanjali Ikat Craft Stencil
- Peacock Fancy Craft Stencil
- African Wave Craft Stencil
- Raphia Grafic African Craft Stencil
- Primitivo Lace Craft Stencil
- Sultan Swirl Craft Stencil
- Eastern Lattice Craft Stencil
- Stitched arrows Craft Stencil
Gold Leaf Variation:
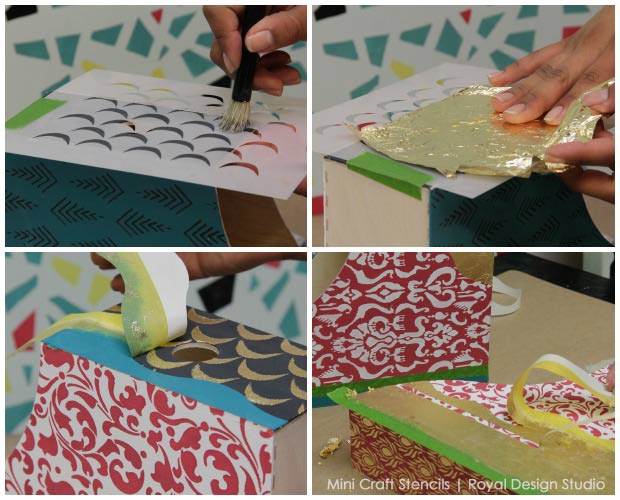
Add in some pops of metallic leaf for some shimmer drama! Instead of stenciling with paint, stencil with Clear Royal Design Studio Stencil Size using a 3/4” stencil brush. Allow the size to dry for about 5 min and apply a second coat. Wait another 5 to 10 minutes for size to dry or until it becomes tacky. Apply gold leaf trough the stencil and use a piece lamb’s wool or soft cloth to burnish to burnish the leaf before removing the stencil. Reposition the stencil following the stencils registration marks, and repeat to cover the whole area. See our other post on How to Stencil with Royal Stencil Size for more ideas and details!
Use FrogTape® to add some interesting details....
Once all the sides from the magazine files are stenciled. Use Frogtape regular multi-surface tape and Wave Shape tape to mask off different shapes and areas on each side of the magazine files. Be creative! You can create lines, triangles, and any geometric shape you like.
Paint the masked areas as desired, adding as many details as you like. Note: More than one coat of paint will be needed for these areas, so be sure to allow to dry between coats. You can also use the Royal Stencil Size and gold leaf to decorate these areas.
Paint the edges of the Magazine file with a small painting brush.
After all your layers are dry, add a coat of Annie Sloan Clear Wax to the Magazine files for protection. Allow the wax to dry and buff using cheesecloth.
If you want to add the ability to label and relabel the magazine boxes, simply re-tape around the graphite rectangle on the front of the boxes. Paint with three coats of Graphite Chalk Paint, allowing paint to dry between coats. This will allow you to use that section as a chalk board!
Once you are organized in style, check out our other How-to Stencil posts using our Mini Craft Stencils here!


